


How to?
The following howto entries are meant to go through step-by-step various tasks that can be done with Padre. We plan to extend these and add screenshots to aid the learning process and later to turn some of them into screencasts.
Other languages:
Getting Started with Padre on Windows
- Download Padre 0.45 from download the name of the file to be saved on the desktop is called padre-standalone-0.45.msi
- Run this installer by double clicking on the icon.
- It will ask you to accept the terms. Once you did that you can press the Install button.
- Once installation is finished you should be able to see the installed icons by pressing on "Start" then on "Programs" and then selecting "Padre Standalone".
- The package you downloaded is the latest version packaged for Windows but there are
newer versions of Padre on CPAN. You should now upgrade by doing the following:
Click on "Start", "Run", copy the following command and press ENTER:
perl -MCPAN -e "CPAN->upgrade('/^Padre/')"
or maybe better with full path to the Perl executable (perl.exe):
c:\strawberry\perl\bin\perl.exe -MCPAN -e "CPAN->upgrade('/^Padre/')"
This will open a black window. You'll see text printed in that window while Padre is being upgraded. The process can take anywhere between 4-5 minutes and 70 minutes depending on the speed of your Internet connection and the phase of the Moon. - Run Padre by clicking on "Start", selecting "Programs", selecting "Padre Standalone" and clicking on the "Padre" icon. (there will be two windows, a black console and the editor itself). This is considered a bug and it will be fixed in a future version.
- Select "Plug-ins", "Plug-in Manager", you should see a list of plug-ins. Please make sure to enable the "Padre Developer Tools" plug-in and the "Padre Popularity Contest" plug-in as well.
- Click on "Save"
Getting Started with Padre Standalone Plus Six on Windows
This is the previous package that is only recommended for people interested in Perl 6. In the future it will be distributed directly from the Strawberry Perl web site.
- Download Padre 0.41 from download the name of the file to be saved on the desktop is called almost-six-0.41.msi
- Run this installer by double clicking on the icon.
- It will ask you to accept the terms. Once you did that you can press the Install button.
- Once installation is finished you should be able to see the installed icons by pressing on "Start" then on "Programs" and then selecting "Padre Standalone Plus Six".
- The package you downloaded is the latest version packaged for Windows but there are
newer versions of Padre on CPAN. You should now upgrade by doing the following:
Click on "Start", "Run", copy the following command and press ENTER:
perl -MCPAN -e "CPAN->upgrade('/^Padre/')"
or maybe better with full path to the Perl executable (perl.exe):
c:\strawberry\perl\bin\perl.exe -MCPAN -e "CPAN->upgrade('/^Padre/')"
This will open a black window. You'll see text printed in that window while Padre is being upgraded. The process can take anywhere between 4-5 minutes and 70 minutes depending on the speed of your Internet connection and the phase of the Moon. - Run Padre by clicking on "Start", selecting "Programs", selecting "Padre Standalone Plus Six" and clicking on the "Padre" icon. (there will be two windows, a black console and the editor itself). This is considered a bug and it will be fixed in a future version.
- Close the Output window (uncheck View/Show Output)
- Select "Plug-ins", "Plug-in Manager", you should see a list of plug-ins. Please make sure at least the the "Perl 6" plug-in is enabled but it would be better to enable the "Padre Developer Tools" plug-in and the "Padre Popularity Contest" plug-in as well.
- Select "Edit", "Preferences", "Run Parameters" and make sure "Use external window for execution" is checked.
- Click on "Files and Colors" (in older versions it was called "Mime-types"). Select the Perl 6 as "File type" and select "STD.pm" as Highlighter.
- Click on "Save"
Help for problem solving:
run "Start", "Run", type in cmd and press enter. In the black window type echo %PATH% then type perl -V
Upgrade Padre on Windows
Assuming you installed the Almost-Six package you can upgrade it with the following command:
Click on "Start", "Run", copy the following command and press ENTER:
perl -MCPAN -e "CPAN->upgrade('/^Padre/')"
or maybe better with full path to the Perl executable (perl.exe):
c:\strawberry\perl\bin\perl.exe -MCPAN -e "CPAN->upgrade('/^Padre/')"
This will open a black window. You'll see text printed in that
window while Padre is being upgraded. The process can take anywhere between
4-5 minutes and 70 minutes depending on the speed of your Internet connection
and the phase of the Moon.
First Perl 5 Script: Hello world
- Click on "File" and the "New..." and "Perl 5 script"
- Type in your code
print "Hello world\n";at the bottom of the file - Save the file as hello.pl
- Click on "Run" and "Run script"
- A black window should be displayed and inside that window the text "Hello world".
- You should close the window by clicking on the [x] though it will disappear after 1000 secs.
First Perl 6 Script: Hello world
- Click on "File" and the "New..." and "Perl 6 script"
- Type in your code
"Hello world".say;at the bottom of the file - Save the file as hello.p6
- Click on "Run" and "Run script"
- A black window should be displayed and inside that window the text "Hello world".
- You should close the window by clicking on the [x] though it will disappear after 1000 secs.
Using Help
Padre really wants to help you, as such there is no single set of help documentation for now.
Key bindings for F1 will bring up the DocBrowser, a means to search for and browse Perl documentation, F2 searches the core language documentation, such as built in functions ( split, join ), variables and core Modules.
Using the DocBrowser
Perl comes with a wealth of documentation, the perldoc command allows the programmer to access the documentation for a given module:
pete@eeeyore~ $ perldoc Net::LDAP

NAME
       Net::LDAP - Lightweight Directory Access Protocol

SYNOPSIS
        use Net::LDAP;

        $ldap = Net::LDAP->new( 'ldap.bigfoot.com' ) or die "$@";
or when used with the -f switch, documentation on built-in functions:
pete@eeeyore~ $ perldoc -f split
       split /PATTERN/,EXPR,LIMIT
       split /PATTERN/,EXPR
       split /PATTERN/
       split   Splits the string EXPR into a list of strings and returns that list.  By default, empty leading fields are
               preserved, and empty trailing ones are deleted.  (If all fields are empty, they are considered to be
               trailing.)
...
However having an open console to alt-tab to typing perldoc Module::Name or perldoc -f function gets tedious quickly.
You can do this in Padre itself.
Using F1 to access documentation for Installed Modules
The current key binding F1 will bring up the "DocBrowser":
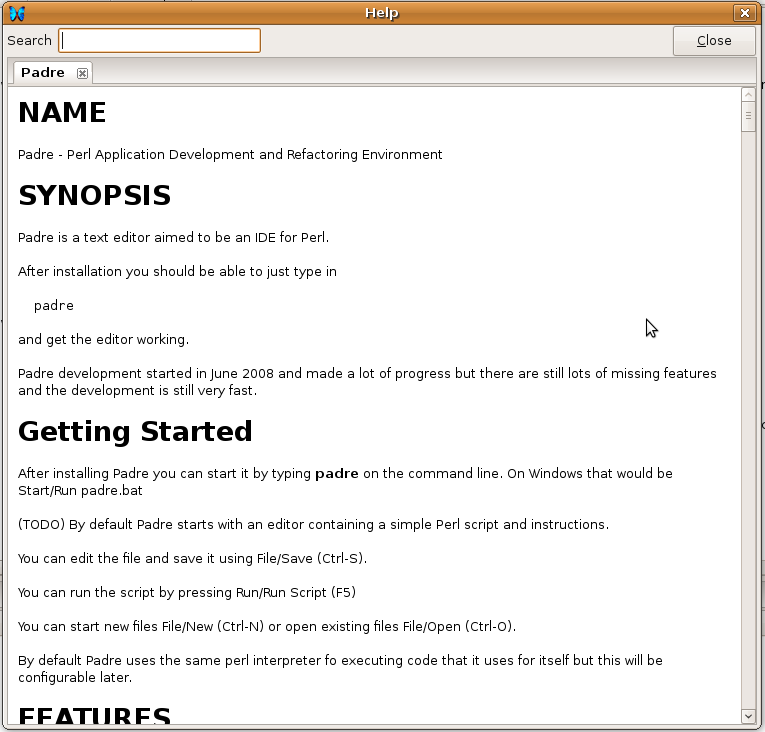
Here you can see the initial Help opens and presents you with the documentation from Padre.pm.
The DocBrowser is your way of searching for and browsing the documentation for any installed Perl Modules that contain POD.
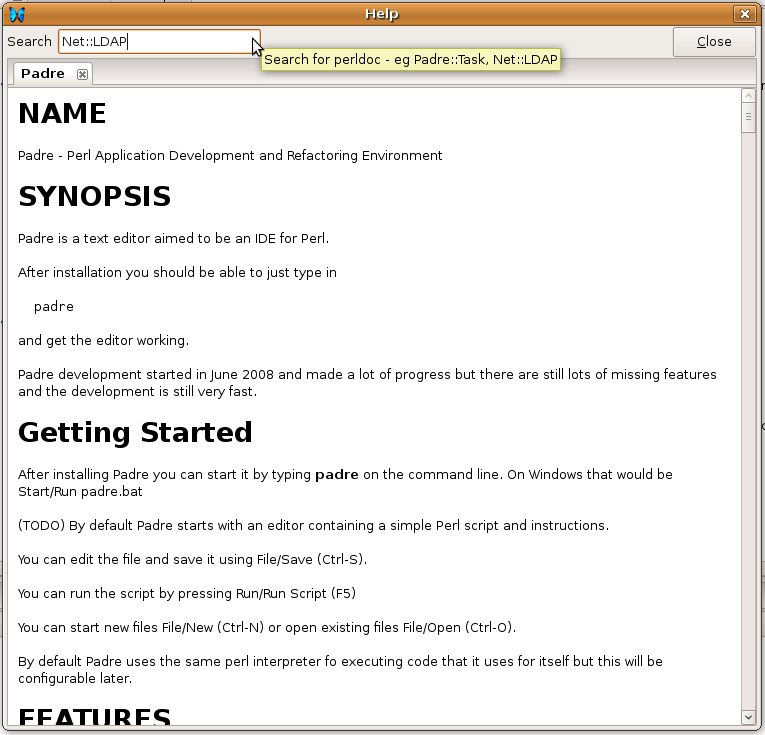
Now it's time to search for information about the document we are currently interested in using. In this case Net::LDAP.
The DocBrowser will create links to documentation referenced and linked to within any documentation file.
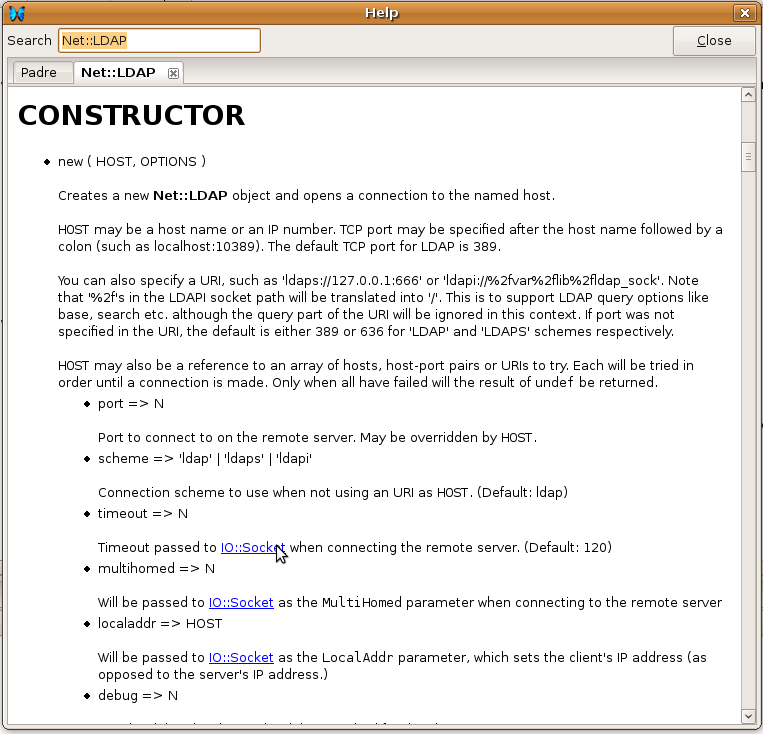
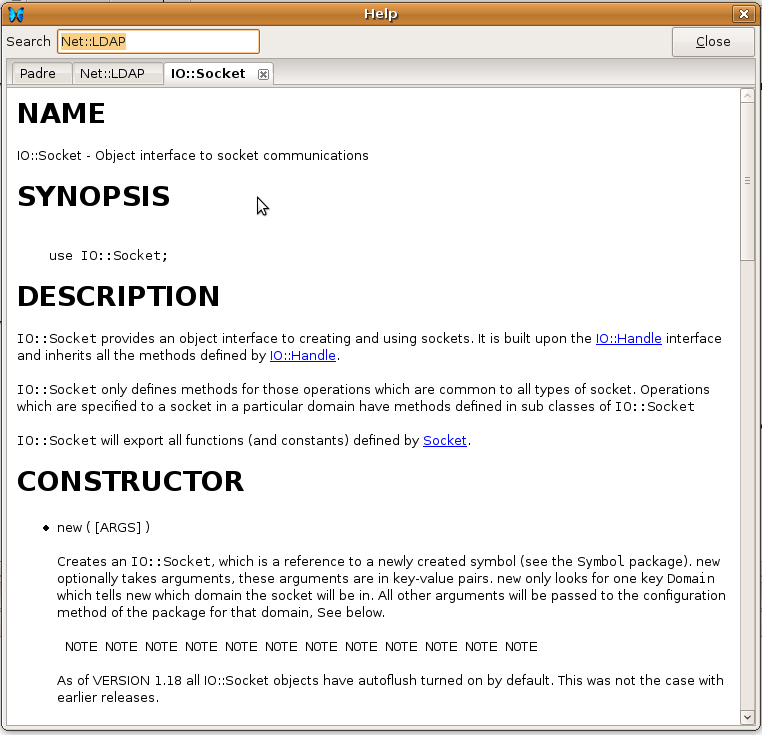
In this case IO::Socket is referenced and a link has been created, clicking on the link will open a new tab with the IO::Socket POD.
Using F2 for Perl documentation
To search for help on built in functions, such as split or join, global variables, such as $$ or $/,
or any of the core Modules, the key binding for the Help Search dialog is F2.
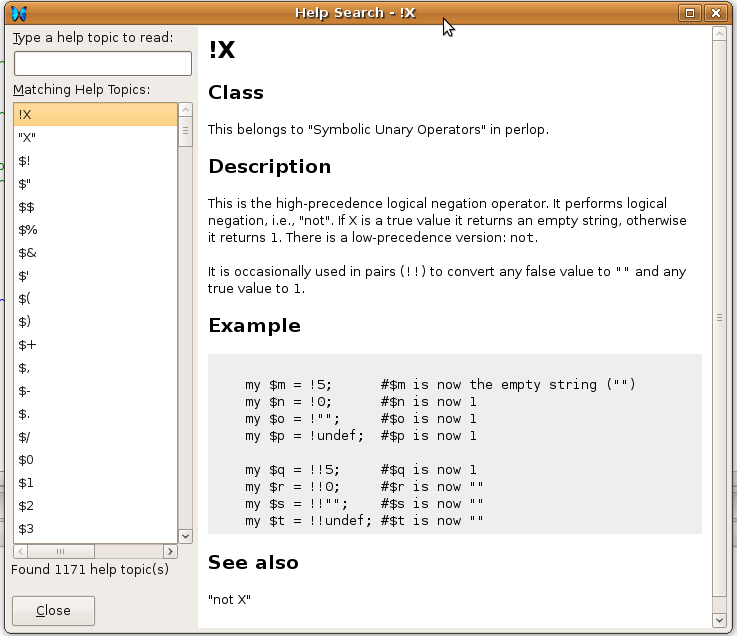
With the dialog box now open, you can type in terms to search for:

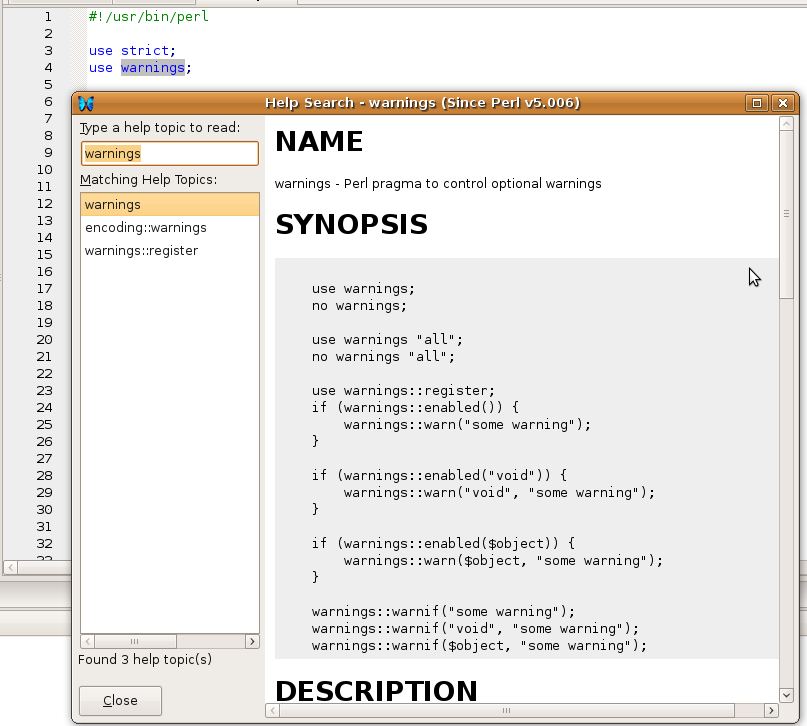
This help search is better integrated into Padre, highlight a word or module name ( such as warnings ) and hit F2, Help will
show you the documentation related to the item high lighted in the main Padre document window.
How to rename a lexical variable?
There are times while writing code you come up with variable names that lack imagination and while at the time you can 'get away' with this initial short coming, when you later return to the code, or worse, someone else is now working on it, you realise that initial lack of a suitable name really starts to cause you pain trying to remember just what it is that the variable does.
One of the refactoring tools Padres provides you is the ability to "Lexically Rename" a variable.
To understand what it is to "Lexically" rename a variable, it's best to think of the renaming of a variable within the current scope the variable was declared within.
For the example shown, the scope for all the variables being renamed is confined within the sub routine itself. That means that any variable with the same name in other functions or part of the script are NOT touched. To do that you would use a "global" find and replace.
This howto uses the example taken from one of the Padre contributors who also happened to blog about using Padre to refactor one of his modules. This I hope is the screen shots he wished he could have included in the blog post. Thanks tsee!
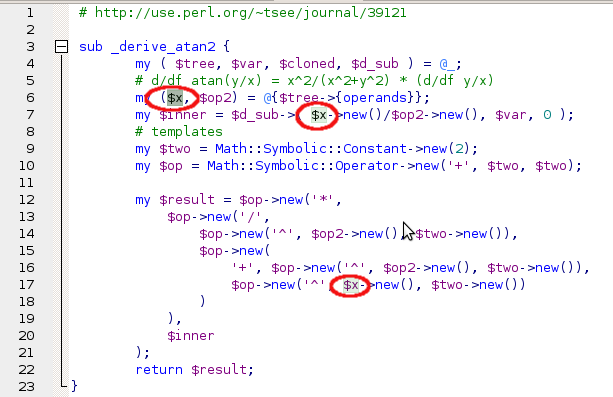
First of all, lets see the code as it stands before we make any changes:
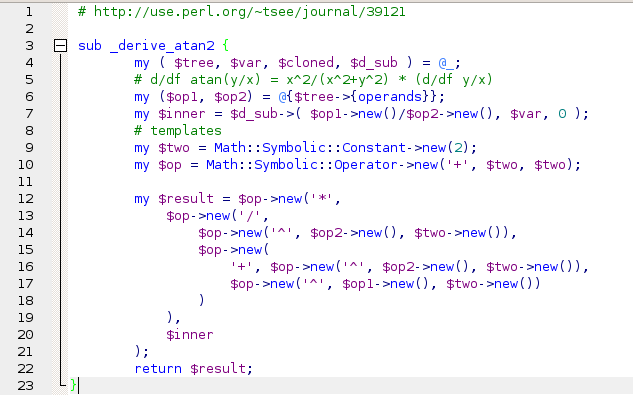
We can see in tsee's blog post that the first thing he wants renamed are the $op1 and $op2 variable names:
- The $op1 and $op2 variables correspond to the function operands y and x respectively. $d_sub is a closure that can derive recursively. The two templates are simply a shorthand so I didn't have to write
someclass->new(...)repeatedly. To make x and y more apparent and to name $d_sub more fitting to its purpose, I open up the file in Padre, right-click each of those variables, select Lexically Replace Variable from the context menu, and provide the new names. Similarly, I replace $inner.
First locate any instance of the variable name and click on it so that the cursor is "inside" the variable name.
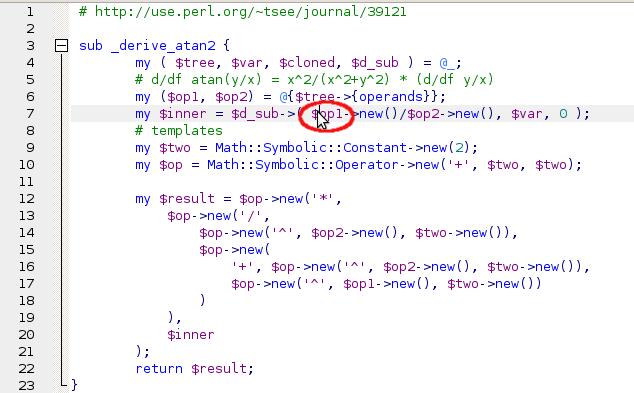
Unfortunately at the moment I can't get a screenshot while the menu system is active, however to get the "Lexically Rename Variable" you can either right click on the variable name and you should see "Lexically Rename Variable" in the context menu. The other place to find it is under "Perl" in the Menu.
You will then be presented with a dialog asking for the new name:
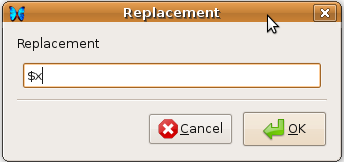
Here we want to rename $op1 to $x.
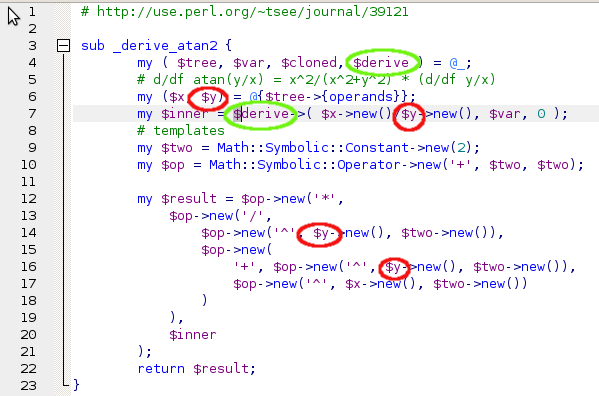
The end result can be seen:
So now we go ahead and rename all the variables:
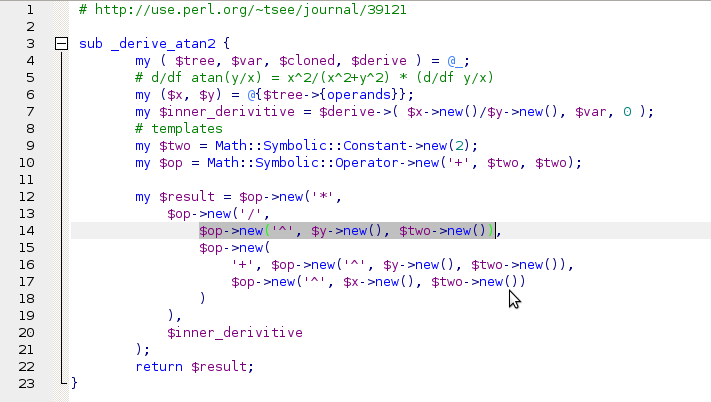
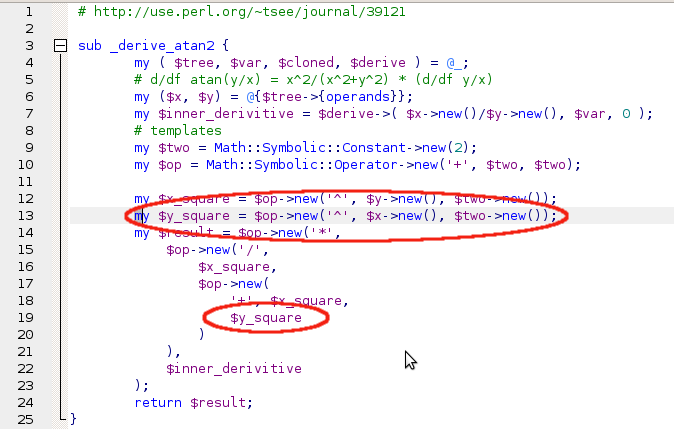
Next tsee laments the complexity of the code block:
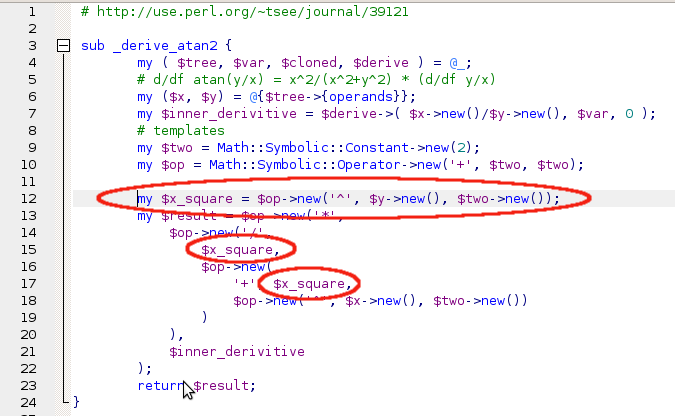
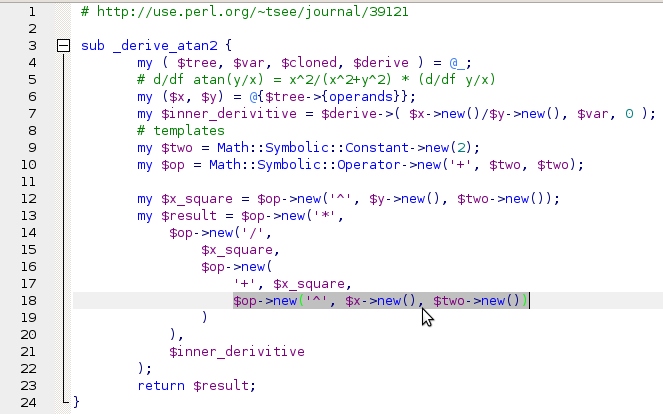
- Of course, that leaves the giant expression intact which actually calculates the result. It makes sense to add a few more temporary variables with descriptive names. I select $op->new('^', $x->new(), $two->new()) in the above version of the code, right-click, and select Insert Temporary Variable. Then I type the name of the new variable $x_square. Padre finds the beginning of the current statement for me and inserts a temporary variable declaration for $x_square at that point. It also replaces the selected text with $x_square. I manually replace another occurrence of the new temporary and then select $op->new('^', $y->new(), $two->new()) and have it replaced with $y_square accordingly. There's more that can be cleaned up, but this handful of clicks and practically no typing has improved the code's readability considerably:
Thanks to this valid requirement, lets see how this is done in Padre!
First of all select the code we want the new temporary variable created for:
Next either right click the highlighted code or from the menu click Perl and then "Introduce Temporary Variable". You will
be then asked for a name for the variable.
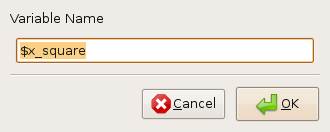
With the new name decided upon, click OK and the new variable is then created and used:
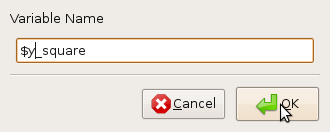
And the same is done when we want to create a new temporary variable for $y_squared:
There you have two useful examples of refactoring your code based upon a real world example. I'll leave it to tsee to sum up: "Thus Padre helps me refactor crufty code with ease."
How to get involved in the development of Padre and its plug-ins?
Behind this item there are lots of issues. We maintain a separate set of Howto's on the developers wiki.